In this beginner’s guide, I will teach you to learn how to hold your clarinet in a proper playing position.
Also, you will learn about home keys – in other words, how to place fingers on the correct keys of the clarinet.
1. Hand Position
When playing the clarinet, it’s essential to position our hands in a C shape. I often call it Lego hands due to the resemblance to a Lego person’s hands.
To start, place your left hand in front of your chest, with your right hand below it. If you’ve ever played a recorder in music class, it’s the same.
2. Holding Clarinet
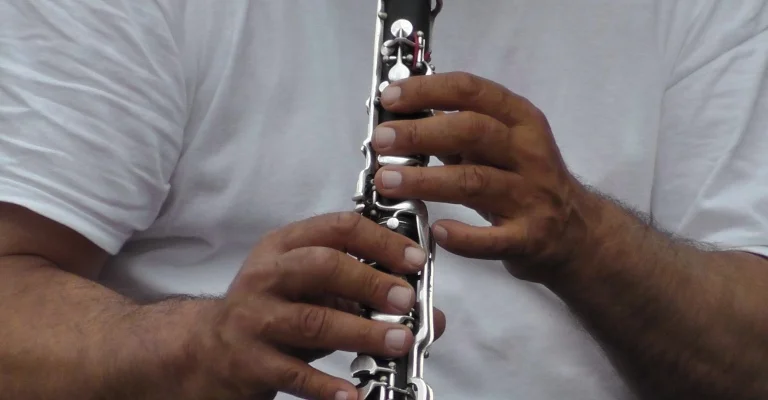
Now, let’s pick up our clarinet and look at the backside. Our reed is aligned with our long, slender key and thumb rest. The thumb rest goes on your right hand.
Remember, the right hand is in a C-shape like a Lego person. Place the thumb rest on top of your right thumb to support the weight of the clarinet while playing.
After that, place your left hand on the upper part of the clarinet to help balance it while playing.
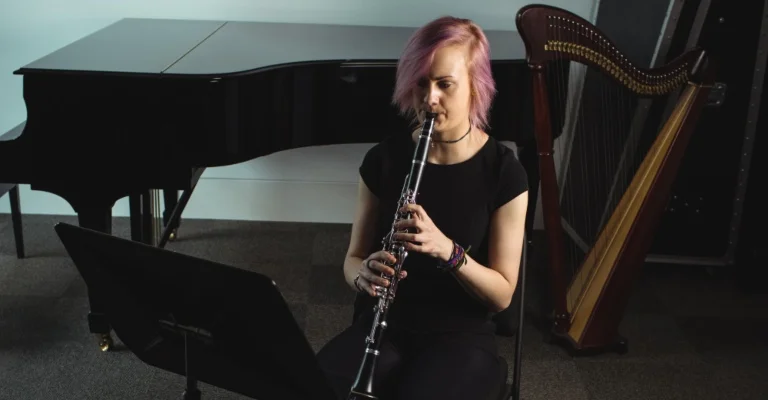
The angle of the clarinet coming out of your mouth should be about a 45-degree angle down towards the floor.
You should avoid pointing the clarinet too high in the air or holding it too close to your body.
3. Clarinet Home Keys

Now that we have learned the proper hand position for the clarinet, it’s time to familiarize ourselves with the home keys.
Each finger on both hands of a clarinet player is assigned a specific key or button, known as a home key.
Left Hand Fingers
Begin by mastering the home keys with your left hand, which is positioned on the upper part of the clarinet.
Our left-hand thumb is in charge of the hole on the back of the clarinet. It’s the only hole on the back of your clarinet that’s for your left-hand thumb.
Moving to the front of the clarinet, your left-hand index finger goes on the first hole. Then skip the metal key, and the second finger goes on the next hole.
Again, skip the little sliver key, and the third finger goes to the next hole.
So, your left-hand fingers positions are – thumb on the back hole and the three holes on the front we go one, two, three.
Right Hand Fingers
Now let’s learn our right hand, which is the hand that’s on the bottom section of the clarinet. Of course, you already know that the right-hand thumb is supporting the thumb rest. So finger positioning on the home keys is easy.
There are three holes in the bottom section of the clarinet. We use our first finger, second finger, and third finger to cover these holes.
Your right pinky is in charge of four buttons, and your left pinky is in charge of buttons on the upper part of the clarinet.
4. Sitting Posture
When you play the clarinet, you should sit on a comfortable chair. But the more important thing is the sitting posture.
When you sit and play your instrument, you don’t want your shoulders to be hunched down. Also, you don’t want to be leaning back against your chair. You want to be sitting up tall with your back straight as if you’re having your school picture taken.
A good way to get yourself in the proper sitting position is to stand in front of your chair with good posture. Then, slowly lower yourself and have a seat on the chair.
Stay in that position as if you could get right back up again without any effort at all.
Now you know the correct way to hold a clarinet and also, to sit properly when playing.
Conclusion
So, to review what we’ve learned. Both hands should be in a C-shape like the hands of a Lego person. The upper part of the clarinet is held by our left hand and the lower part by our right hand. The clarinet’s weight is carried by your right-hand thumb, which rests under the thumb rest of the instrument. Also, you know the finger positioning on the home keys, the clarinet holding angle and the proper way of sitting while playing.